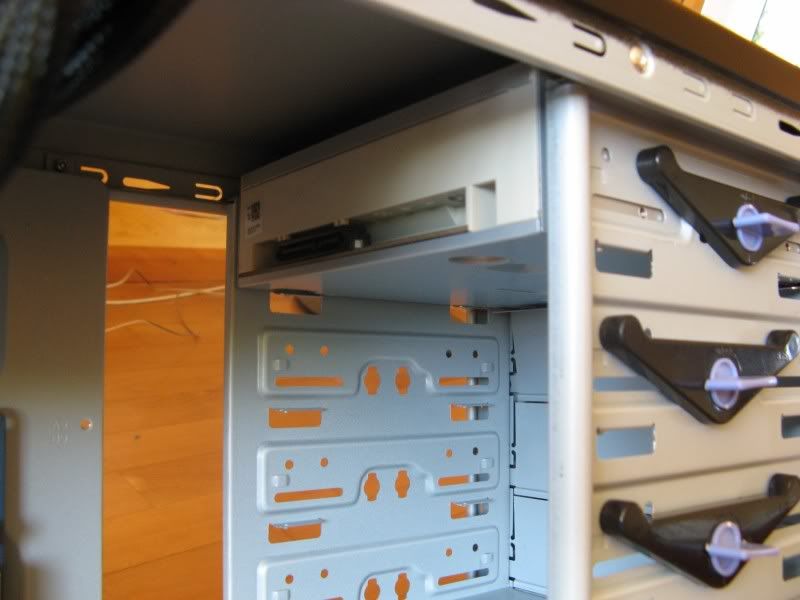
After the optical drive, install the hard drive in the same manner. The only difference is that the hard drive should slide in to the lower cage from inside the case. Make sure the you insert it the correct way, so that the power and data connectors are facing the back of the case, ready to connect up at a later point. If you are installing a large graphics card (I.e. for a gaming computer), you may want to ensure you put the hard drive in the lower space to make as much room as possible for the graphics card and PSU cables.Of course – if this build is using multiple graphics cards (SLI or Crossfire), then careful planning is needed prior to fitting the parts.
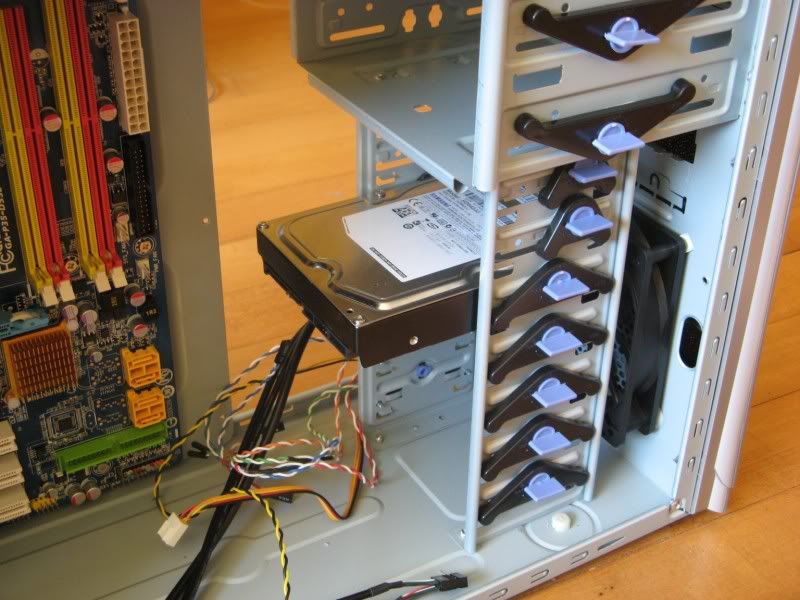
By now, the inside of the case should be starting to take shape. The motherboard, power supply, optical drive, & hard drive are all installed. Next we'll move on to the components that connect to the motherboard directly.
CPU – in this example, we have used a Socket 775 (Intel E8400) processor & motherboard combination. Other combinations may look different, such as having pins on the processor itself & not on the motherboard. Either way, take extreme caution, as even a slight bend to one of these pins can render the component useless.
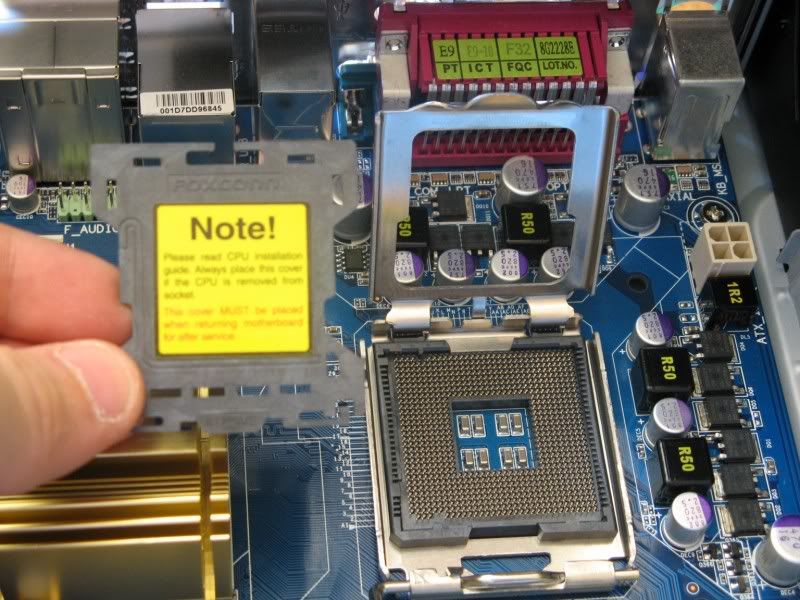
Using the lever next to the CPU socket, unhinge it & then open the metal gate surrounding the socket. Most will have a protective cover that needs removing.
Using the lever next to the CPU socket, unhinge it & then open the metal gate surrounding the socket. Most will have a protective cover that needs removing.
Handling the CPU gently by the edges, place the CPU into the socket, ensuring it is aligned the correct way.
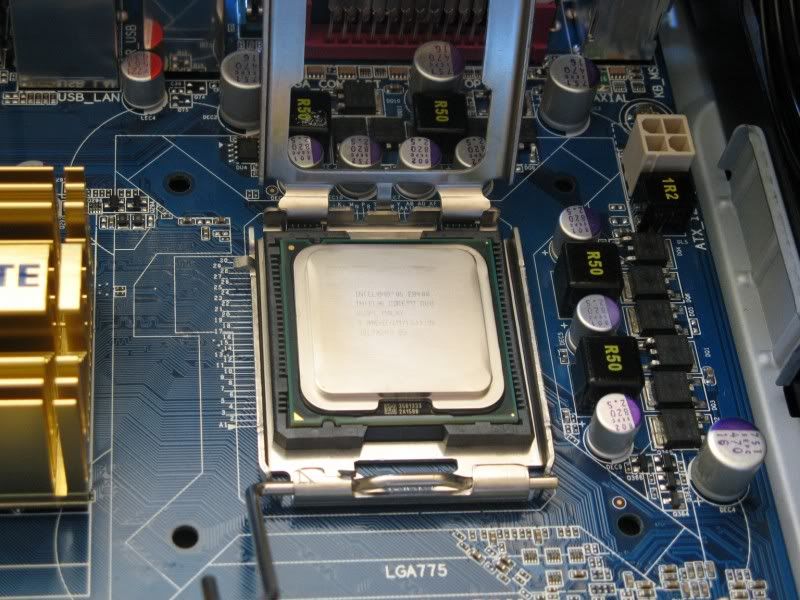
Last - use the lever to lock the metal gate surround into place – you may need to use some pressure.
After the CPU is installed, fit the CPU heatsink/fan. If you have purchased a retail CPU, most should already have the thermal paste pre-applied to the heatsink. If this is the case, then you do not need to worry about putting your own paste on. If this is`nt the case, you'll need to squeeze a small amount (about a grain of rice) onto the CPU before mounting the heatsink on the top.
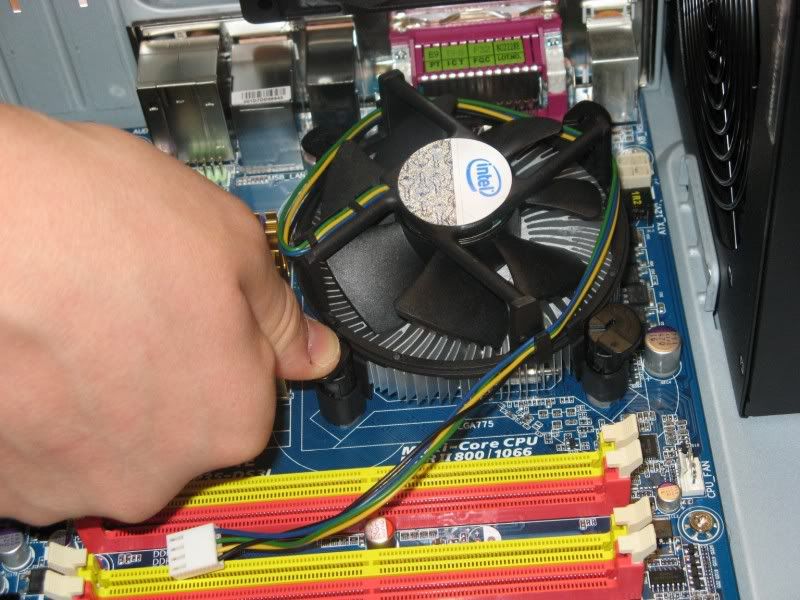
Once the thermal paste is applied & the CPU is ready to go, line up the heatsink & sit it in place. (If you are using a 3rd-party heatsink, you will need to follow the instructions provided with it). Press down firmly on the 4 corner clips to properly attach the heatsink to the motherboard, which puts the proper amount of pressure onto the CPU for maximum heat dissipation.
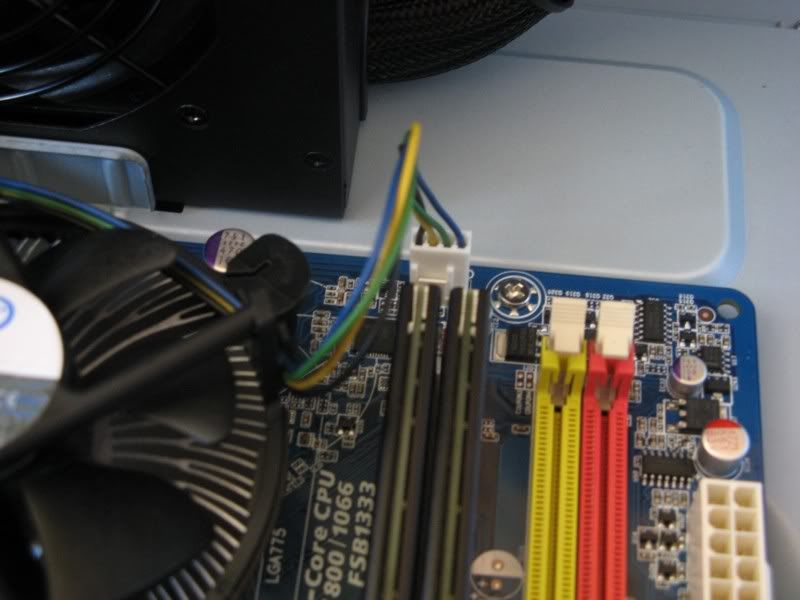
While we're on the CPU, we'll finish off the job by attaching the heatsink/fan power & the sensor connector to the motherboard & the 4-pin CPU power connector from the PSU to the motherboard close to the CPU. (Some newer variants may have an 8-pin power connector - this is for new high-powered CPU and motherboard combinations - consult your motherboard manual for which one you should use).
The RAM sticks are relatively easy to install. If your motherboard supports a dual-channel configuration, then it will most likely have the dual-channel slots already marked as such. In our example, we can see the slots are colour-coded - so install matching pairs of RAM sticks into matching slots. For our example, this means slots 1 and 3 will then be populated.
Once you've sorted out where the sticks are being installed, unlock the slots by moving the end levers outward.
build your own pc page 3

No comments:
Post a Comment